

Ataque doble Guía del build Bárbaro Final del juego · Diablo 4 · Temporada 15
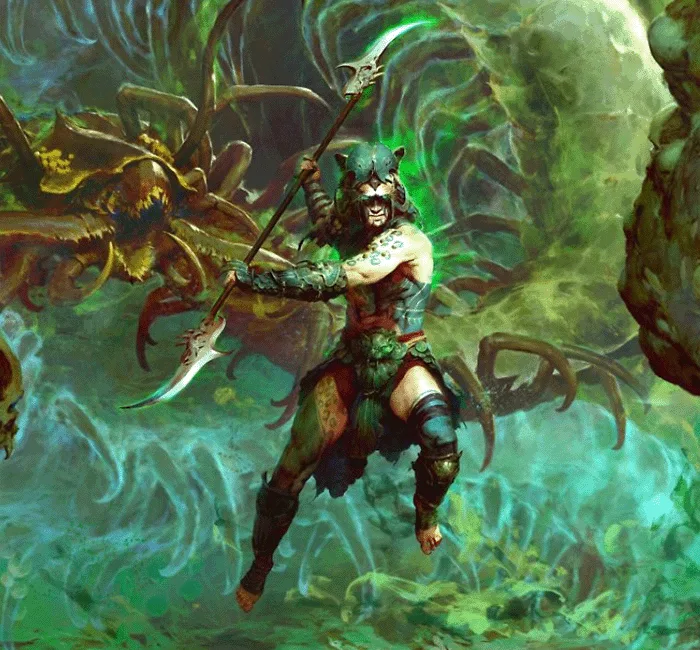
Ataque doble es un build Final del juego de Bárbaro para la Temporada 15. La barra de habilidades incluye Piel férrea, Ataque doble, Cólera de berserker, Grito de guerra, Grito desafiante y Grito alentador. Equipo principal: Obra maestra de Ramaladni y Anillo de furor rojo. En leyenda usa Iniciar, Invocaguerras, Rabia sangrienta y Matanza con los glifos Contendiente, Cólera, Remolino y Triturador.
Bárbaro Final del juego Build (A-Tier) por Chrix1848
Habilidades
- Rugido poderoso (Rango 1)
- Atronador (Rango 1)
- Juggernaut (Rango 1)
- Remolino (Rango 1)
- Berreo (Rango 1)
- Matanza máxima (Rango 1)
- Cólera de berserker (Rango 15)
- Grito de guerra (Rango 15)
- Grito desafiante (Rango 4)
- Grito alentador (Rango 15)
- Piel férrea (Rango 1)
- Ataque doble (Rango 15)
- Probabilidad de golpear dos veces (Rango 1)
- Aumento de daño (Rango 1)
- Ferocidad (Rango 1)
- Aumento de duración (Rango 1)
- Fortificación (Rango 1)
- Potencia (Rango 1)
- Velocidad de movimiento (Rango 1)
- Vida máxima (Rango 1)
- Bonus de daño (Rango 1)
- Bonus de duración (Rango 1)
- Arrollamiento (Rango 1)
- Generación de furia (Rango 1)
Objetos
- Voluntad de Tibault
- Talismán de Locran
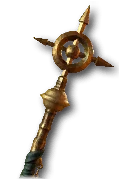
- Obra maestra de Ramaladni
- Anillo de furor rojo
- Golpes gemelos
- Piedra de Jordán
- Corona de Leoric
- Conocimiento
- Lluvia
- Llamada a las armas
- Infinidad
Rasgos
- Rasgo de rompetierras
Configuración de equipo
- Helm: Corona de Leoric
- Chest Armor: Lluvia
- Gloves: Golpes gemelos
- Pants: Voluntad de Tibault
- Boots: — Rasgo de rompetierras
- Amulet: Talismán de Locran
- Ring 1: Anillo de furor rojo
- Ring 2: Piedra de Jordán
- Main Hand: Llamada a las armas
- Off-Hand: Obra maestra de Ramaladni
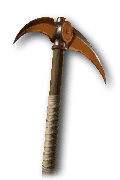
- Two-Handed Slashing: Conocimiento
- Two-Handed Bludgeoning: Infinidad
Paneles de leyenda
- Iniciar
- Invocaguerras
- Rabia sangrienta
- Matanza
Glifos
- Contendiente
- Cólera
- Remolino
- Triturador
Mercenarios
- Primario: Raheir (Tank)
- Refuerzo: Raheir (Tank)
Double Swing build at a glance
This Double Swing build turns the Barbarian into a fast dual-wield brawler.  Double Swing is your only attack; everything else on the bar is a Shout or a defensive tool. Your damage scales with how much Fury you are holding. At 100 Fury,
 Sescheron's Fury makes you Colossal, and
 Ramaladni's Magnum Opus adds damage for every point of Fury you have. On top of that you get Dust Devils from the Twister upgrade and guaranteed Critical Strikes from
 Ring of Red Furor.
The build is very tanky, very mobile and easy on your fingers. It handles Speedfarm, Infernal Hordes, Nightmare Dungeons and bosses well. It is not a contender for the highest Pit tiers, because it lacks that last burst of peak damage. Pick it if you want a straightforward melee character that shrugs off hits and still clears quickly.
Variants at a Glance
| Midgame (Uniques) | Endgame (Mythic) | |
|---|---|---|
| Gloves |  Twin Strikes |  Fists of Fate |
| Rarity | Unique items | almost everything Mythic Unique |
| Paragon | four boards | five boards incl. Flawless Technique |
| Seal |  Ancestral Horadric Seal |  Seal of the Diamond Mind |
| Charms | 5 pieces of Sescheron's Fury | 4 pieces of Sescheron's Fury plus  Hellfire Torch |
Treat the Midgame variant as your stepping stone to Endgame. Skills, weapons and most of your gear stay the same. You only swap gloves, seal and one charm, then upgrade your items to Mythic one by one.
Requirements
Sescheron's Fury is the heart of the build. Without its bonus at 100 Fury you lose the biggest damage multiplier, and the build feels flat.You cannot replace Ramaladni's Magnum Opus, because it ties your damage directly to your Fury. Ring of Red Furor provides the guaranteed Critical Strikes. Without it you will barely crit at all, since the Splinter of Hellfire removes your Critical Strike Chance.
 Call to Arms and
 Tibault's Will are upgrades rather than requirements. Missing them costs you ranks, Life and Fury sustain, but the build still works. Add the runewords
 Rain,
 Insight and
 Infinity once you have the runes.
Combat Rotation
- Open with
 War Cry and
 Challenging Shout. While any Shout is active, Call to Arms grants five ranks to all skills plus extra Life and Maximum Fury.
- Use
 Iron Skin whenever it is ready. The Juggernaut upgrade makes you Unstoppable, which turns on Tibault's Will.
- Spam Double Swing. Every sweep spawns Dust Devils.
- Weave in
 Rallying Cry while running between packs. It costs Fury, so only cast it when you stay safely above 100.
- Save
 Wrath of the Berserker for elites, big packs and bosses.
Wrath of the Berserker right away and keep your Shouts on cooldown. In between, keep swinging with Double Swing non-stop.How the Damage Works
Fury is your multiplier
- Colossal: At 100 Fury, Sescheron's Fury makes you Colossal. You deal a lot more damage but cast more slowly. With five set pieces the bonus grows sharply and your Maximum Fury rises by 50.
- Damage per Fury: Ramaladni's Magnum Opus adds damage per point of Fury, but drains Fury every second in combat.
- Above 50 Fury: Aspect of Anger Management on the amulet grants bonus damage and Berserking, also at the cost of Fury per second.
Critical Strikes and Overpower
- Ring of Red Furor makes your next Double Swing a guaranteed Critical Strike after you spend 30 Fury within five seconds.
 Locran's Talisman boosts Critical Strike damage heavily but halves your Critical Strike Chance. The Splinter of Hellfire adds damage and removes the chance entirely. Your crits therefore come almost only from the ring.
- Overpower is a state that massively boosts your next hit. You gain it from
 Banished Lord's Talisman and the Overpower upgrade on Wrath of the Berserker. Earthstriker's Aspect grants extra damage while you have Overpower.
Other pieces
- Infinity makes nearby enemies Vulnerable, so they take more damage from you.
 Stone of Jordan sets every Resistance to your highest one and boosts damage of that element. The Physical Resistance on your charms keeps Physical in first place.
- Rain unleashes Druid Tornadoes and protects you when you Dodge.
Skills
| Slot | Skill | Job |
|---|---|---|
| 1 | Iron Skin | Barrier, Unstoppable, speed |
| 2 | Double Swing | main attack, Dust Devils |
| 3 | Wrath of the Berserker | damage window, Overpower |
| 4 | War Cry | damage, Berserking |
| 5 | Challenging Shout | damage reduction, taunt |
| 6 | Rallying Cry | speed, resource generation, Fortify |
Upgrades that shape the build:
- Twister (Double Swing): every sweep creates Dust Devils that deal damage on their own.
- Juggernaut (Iron Skin): grants Unstoppable and knocks attackers back. This is what makes Tibault's Will work.
- Overpower (Wrath of the Berserker): one stack of Overpower per second while Wrath is active.
- Booming (Rallying Cry): more resource generation and movement speed. Fortify is an extra layer of Life that softens incoming damage.
All upgrades in detail
- Double Swing: Chance to Hit Twice, Damage Increase per enemy hit, Twister
- Rallying Cry: Fortify, Booming, Potency
- Challenging Shout: Duration Bonus, Bawl, Damage Bonus against the first taunted enemies
- War Cry: Ferocity, Duration Increase, Mighty Roar with Berserking
- Wrath of the Berserker: Fury Generation with extra Attack Speed, Maximum Carnage, Overpower
- Iron Skin: Movement Speed, Juggernaut, Maximum Life
For your Arsenal technique, pick Polearm expertise. It raises your Lucky Hit Chance and your damage while Healthy. You do not need to wield a polearm for it.
Gear and Aspects
A Greater Affix (★) is an affix with a much higher roll. Tempering adds one extra affix from a recipe. Masterworking upgrades affixes in steps; the target affix is marked with ◆.
| Slot | Item | Key affixes | Tempering |
|---|---|---|---|
| Helm |  Leoric's Crown | Cooldown Reduction ★◆, Attack Speed | Maximum Life ★ |
| Chest | Rain | fixed rolls, Maximum Fury | Maximum Life ★ |
| Gloves | Twin Strikes | Vulnerable Damage ★◆, Attack Speed | Critical Strike Damage ★ |
| Pants | Tibault's Will | Fury Regeneration ★◆, Armor | Maximum Life ★ |
| Boots | Earthstriker's Aspect | Ranks to War Cry ★◆, Maximum Life, Fury Regeneration | Movement Speed ★ |
| Amulet | Locran's Talisman | Vulnerable Damage ★◆, Cooldown Reduction | Cooldown Reduction ★ |
| Ring 1 | Ring of Red Furor | Vulnerable Damage ★◆, Attack Speed | Cooldown Reduction ★ |
| Ring 2 | Stone of Jordan | fixed rolls, Cooldown Reduction ★◆ | Cooldown Reduction ★ |
| One-hander 1 | Call to Arms | fixed rolls, All Damage ★◆ | Critical Strike Damage |
| One-hander 2 | Ramaladni's Magnum Opus | Critical Strike Damage ★◆, Strength | Critical Strike Damage ★ |
| Slashing | Insight | fixed rolls, Critical Strike Damage ★◆ | Critical Strike Damage ★ |
| Bludgeoning | Infinity | fixed rolls | Critical Strike Damage ★ |
Transfigure Aspect of Anger Management onto your amulet. Cooldown Reduction on helm, amulet and rings keeps your Shouts and Iron Skin up almost permanently.
Sockets and runewords
| Slot | Sockets |
|---|---|
| Helm |  Splinter of Hellfire,  Splinter of Pain |
| Amulet |  Splinter of Anguish |
| Ring 1 | Splinter of Hellfire |
| Ring 2 |  Grand Skull |
| Pants | 2×  Grand Ruby |
| Weapons | Grand Skull |
| Chest |  Tam +  Que |
Leoric's Crown counts as jewelry and amplifies the splinters socketed into it. The Splinter of Pain adds damage reduction at the cost of movement speed. The Splinter of Anguish adds Attack Speed but raises your Fury costs. In the chest runeword, Tam builds Offering whenever you cast Double Swing, and Que turns it into a Barrier.
Paragon and Glyphs
Board order: Starter, Warbringer, Blood Rage and Carnage. Path to the glyph sockets first and grab the Life, Resistance and Armor nodes on the way.
| Board | Glyph | Effect |
|---|---|---|
| Starter |  Challenger | more damage to elites |
| Warbringer |  Wrath | Critical Strikes generate Fury |
| Blood Rage |  Twister | damage after each Dust Devil |
| Carnage |  Crusher | Strength in radius |
From level 51 a glyph's radius grows. Push every glyph to that threshold before leveling any single one further. Flawless Technique with Ire joins in Endgame.
Talisman
Ancestral Horadric SealBanished Lord's TalismanSescheron's FuryAncestral Horadric Seal opens six slots. Five of them hold Sescheron's Fury, so every set bonus is active. The sixth slot goes to Banished Lord's Talisman, which grants Overpower after you spend Fury.
Your set charms carry skill ranks or Maximum Fury, each paired with Physical Resistance. Once your Fury pool is large enough, swap Fury affixes for more ranks.
Mercenaries
Raheir is your main mercenary. Ground Slam slows enemies, and through Inspiration they take more damage afterwards. Raheir's Aegis grants you Resistance to All Elements. Bastion pulls damage onto Raheir and, with Inspiration, raises your damage.
Bring Aldkin as reinforcement with Field of Languish. It slows enemies and lowers their damage. It triggers on Double Swing, so it is up practically all the time.
Upgrade Path to Endgame
- Get every glyph to level 51
- Complete Call to Arms, Rain, Insight and Infinity
- Pick up Seal of the Diamond Mind and Hellfire Torch
- Find Fists of Fate to replace Twin Strikes
- Attach Flawless Technique with
 Ire
- Upgrade items to Mythic, starting with Ramaladni's Magnum Opus, Ring of Red Furor and Locran's Talisman
Common Mistakes
- Running low on Fury: Drop below 100 and Colossal ends, taking most of your damage with it. Maximum Fury and Fury Regeneration come before extra damage stats.
- Stacking Critical Strike Chance: It does almost nothing, because the Splinter of Hellfire removes it. Your crits come from Ring of Red Furor.
- Forgetting Iron Skin: Without Juggernaut you never become Unstoppable, and Tibault's Will sits idle.
- Wrong element for Stone of Jordan: Physical has to be your highest Resistance. Rain brings Lightning Resistance, so check your character sheet to see which one leads.
- Spamming Rallying Cry: The Shout costs Fury. Cast it too often and you fall below the Colossal threshold.